.png)
Multi-Level Approval Workflows: The Value
Multi-level approvals refer to a workflow process ensuring that a request or action must be approved by multiple people at different levels of authority before it can be completed.
In Freshservice, once the multi-level approval workflow is set up, requests or actions that require approval will be routed through the defined approval stages, with each stage requiring approval from the appropriate approvers before moving on to the next stage. The approvers will receive email notifications with a link to review, and the approval status and progress of the workflow can be tracked in the Freshservice interface.
For example, if an employee wants to purchase a new software license, they may need to submit a request that is approved by their manager, the IT department, and the finance department before the purchase can be made. Each level of approval may have different criteria or requirements, such as budget limits or specific fields that must be filled out on the request form.
Approvals can also serve as a way of verifying the accuracy of a completed task or project. For example, individuals may seek approval from their manager to confirm/review that the work has been performed correctly.
Benefits of Using Multi-Level Approvals in Freshservice
- Increased control: Ensure that only authorized personnel can approve and complete them, preventing errors, fraud, and other unauthorized actions
- Improved compliance: Ensure compliance with internal policies and external regulations, reducing the risk of penalties, fines, and legal issues
- Greater accountability: Clearly identify the individuals responsible for approving requests and actions, improving transparency and reducing the risk of misunderstandings or disputes
- Enhanced efficiency: By automating the approval process, requestors can reduce the time and effort required to obtain approvals, improving efficiency and productivity by allowing employees to focus on other critical tasks
- Improved communication: Require collaboration between different levels of the organization, promoting better communication to build stronger relationships between teams
- Increased accuracy: Ensure that requests and actions are completed accurately, as each level of approval verifies and approves the information provided, reducing errors and improving the quality of work
- Better visibility: Track the progress of requests and actions to identify bottlenecks and delays, optimizing the approval process for greater efficiency
Freshservice Tips and Tricks to Always Remember
- Tip: Always test your approvals to make sure no portion of it conflicts.
- Tip: An easy way to perform a test run is by putting yourself in as the recipient of the approval.
- Tip: Make sure the approval blocks flow both ways, to the approved and the rejected, making sure you notify the end-user/customer if the approval gets rejected.
How To Create a Multi-Level Approval
Creating a multi-level approval workflow in Freshservice requires careful planning and attention to detail to ensure that the approval process is efficient, effective, and tailored to the organization’s specific needs.
To perform a Multi-Level Approval, follow these steps:
1. Go to the Admin tab.
2. Select the Workflow Automator option from the left-hand menu.
3. Select “New Workflow.”
4. Choose if the approval is Event-based (for an event to occur on a ticket) or Scheduled (time/date).
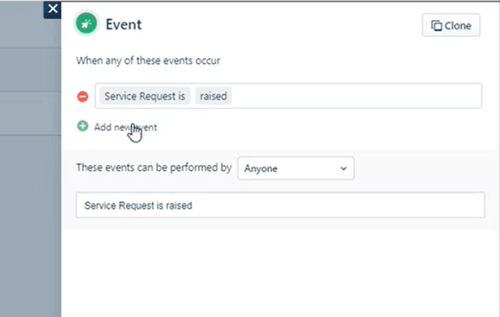
5. Name the workflow and set the trigger conditions for when it should be activated (e.g., event-based workflows: when a new ticket is created, when a certain priority level is set,). This is the first step in the workflow, and it determines when the approval process begins.
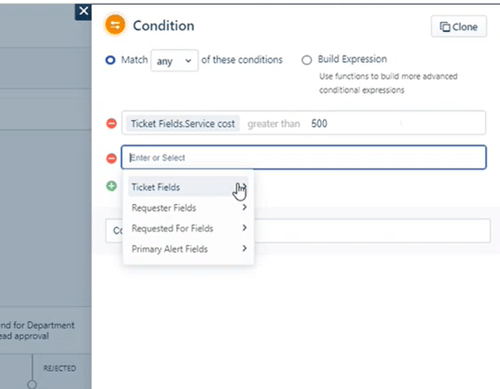
6. Add a Condition Node with appropriate conditions (e.g., the request requires budgetary approval).
7. Add an Action Node, and in the node, select “Approval Request.” This is where you specify who needs to approve the request and what type of approval is needed.
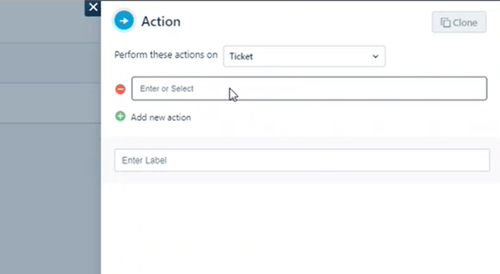
8. Specify who needs to approve the request (e.g., a specific agent, a group of agents), the type of approval (e.g., single approval or unanimous approval), and any additional conditions that need to be met. You can also set a time limit for the approval process to keep it moving efficiently.
9. Repeat steps 6 and 7 for each additional level of approval needed. If you need multiple levels of approval, add them here by clicking the "Add" button and following the same steps as before.
10. Under the "Notifications" section, set up notifications to be sent to the appropriate parties when an approval is requested or completed. This is where you can specify who gets notified and how often.
11. Click on the "Save" button to activate the multi-level approval workflow. After saving the workflow, it is active and will be triggered when the conditions you set are met.
For more Freshservice Tips and Tricks videos, click here.

For more information about our Freshservice Professional Services, click here.
